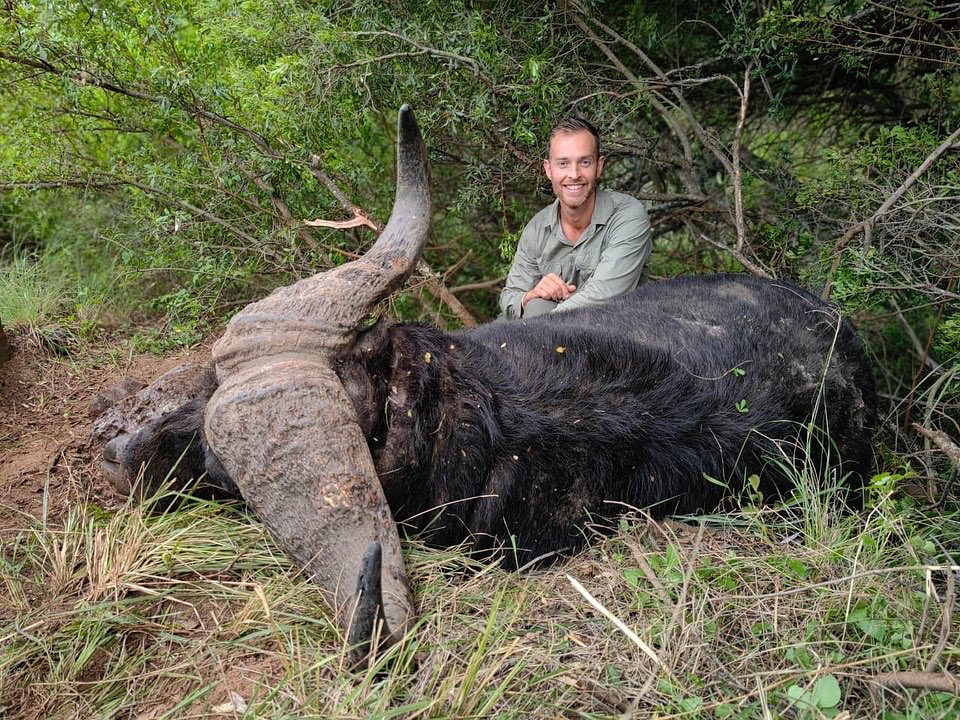
Many hunters like to keep a photographic record of the animals they have successfully hunted. Taking a photograph of a dead animal is a highly emotive issue and the anti-hunting lobby can and does find a lot of ammunition in support of their cause in the pages of hunting publications of hunters posing with their trophies.
Looking through hundreds of hunting trophy photographs I have come to the conclusion that:
- (a) Good hunting photographs of a hunter posing with the animal hunted are very few and far between and
- (b) there is a real skill in taking good hunting trophy photographs.
Either the photograph does not meet ethical criteria, or, in the post-hunt excitement, not enough attention is given to detail.
Taking a hunting trophy photograph should be approached from both a technical and an ethical perspective. Some examples taken from the Internet will be used to illustrate principles. Faces of hunters are blanked out as criticism is intended to be constructive and not to single out individuals. Hopefully, we can all learn from this exercise.
Ethical considerations of a hunting photograph
This in my view is the most important aspect. Taking the life of a living creature should never be taken lightly. Hunters should never reach the point of becoming callous or insensitive – this can so easily be reflected in the type of trophy photograph they take.
The focus of a trophy photograph is the animal – not the hunter. The most important thing to do from an ethical perspective is to show respect by affording dignity to the animal’s life that you have brought to an end. Try, as far as possible, even in death, to give credit to the character and beauty of the animal. There are a number of things you can do to accomplish this.
- Place it in a natural and restful-looking posture. The animal must look as if it is sleeping or resting (Figure 1).
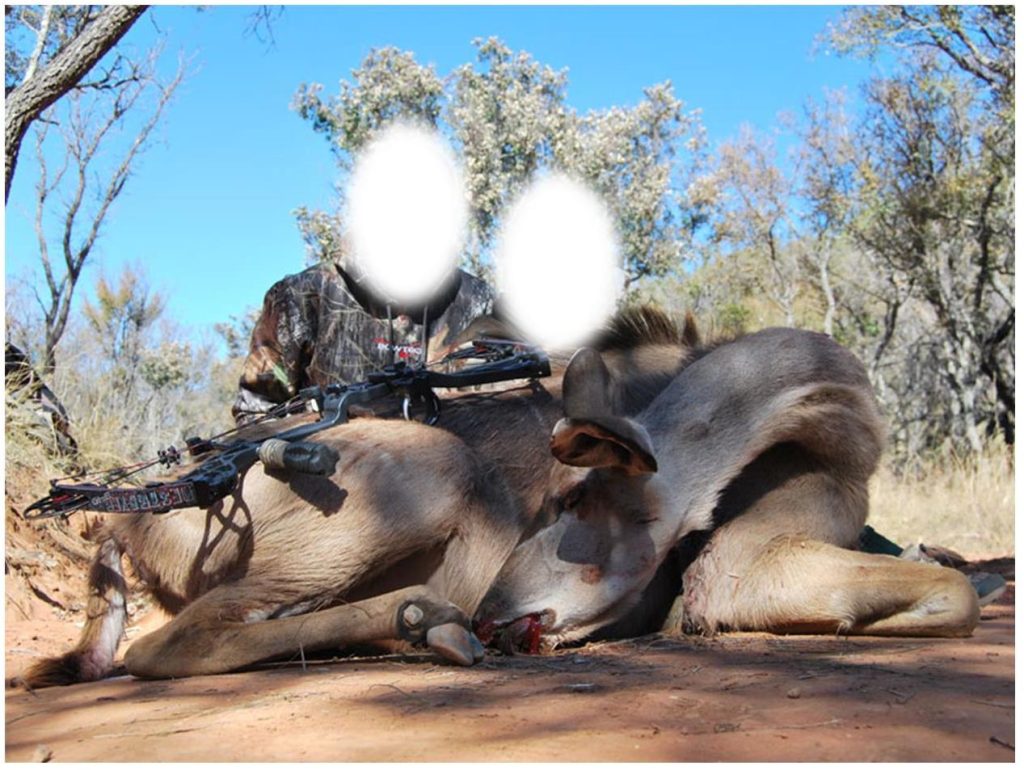 Figure 1: This kudu has been placed in a very unnatural-looking position for the photograph. The tongue is protruding, and blood is visible from the mouth.
 - Clean off any blood that would be visible in the photograph – especially if you are going to submit the photograph to a hunting publication. Hunting magazine editors should not accept “bloody” photographs. It takes only a piece of cloth, some water, and a little effort to clean away blood yet some hunters seem to take a rather morbid delight in showing as much blood as possible. Not acceptable! (Figure 2)
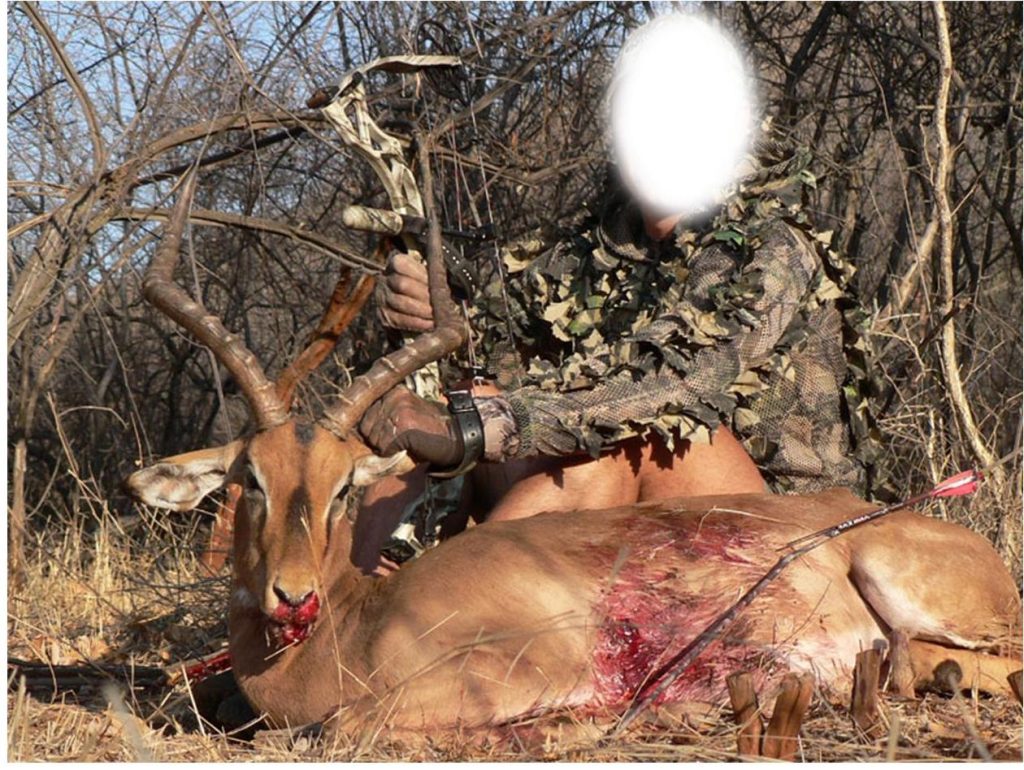
Make sure that the tongue is not hanging out (Figure 3) and wipe away saliva from the mouth and muzzle. Remove visible food from the mouth.
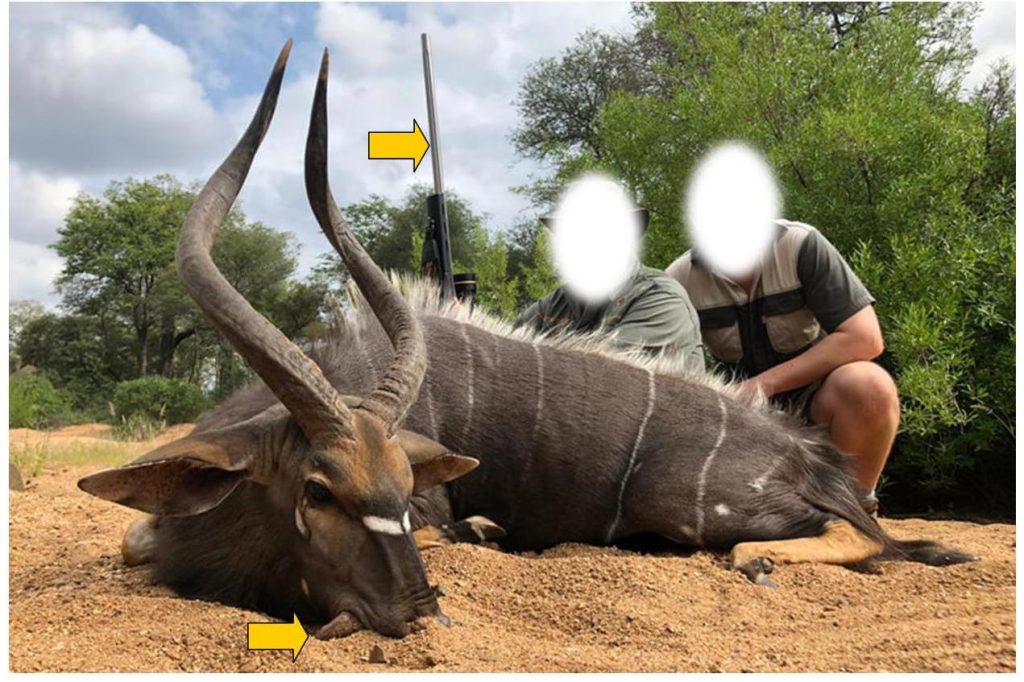
- If possible conceal the entry and exit wound/s by placing the hunting weapon used (rifle or bow) in a position that hides the wound. Or position the animal in such a way or take the photograph from an angle from which the entry/exit wound is not in the frame.
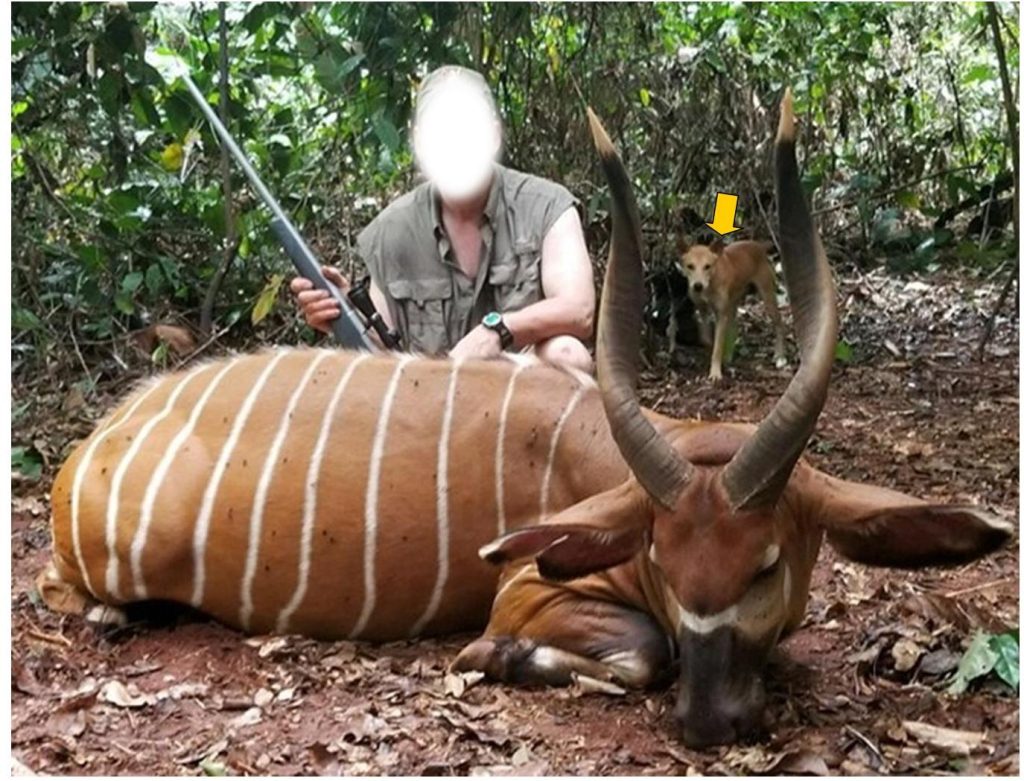
- The hunter should take up a position behind the animal in a kneeling or sitting position and which is not the focal point of the photograph. The hunter must assume a position of secondary importance (Figure 4).

- Don’t put your hands on the animal’s horns.
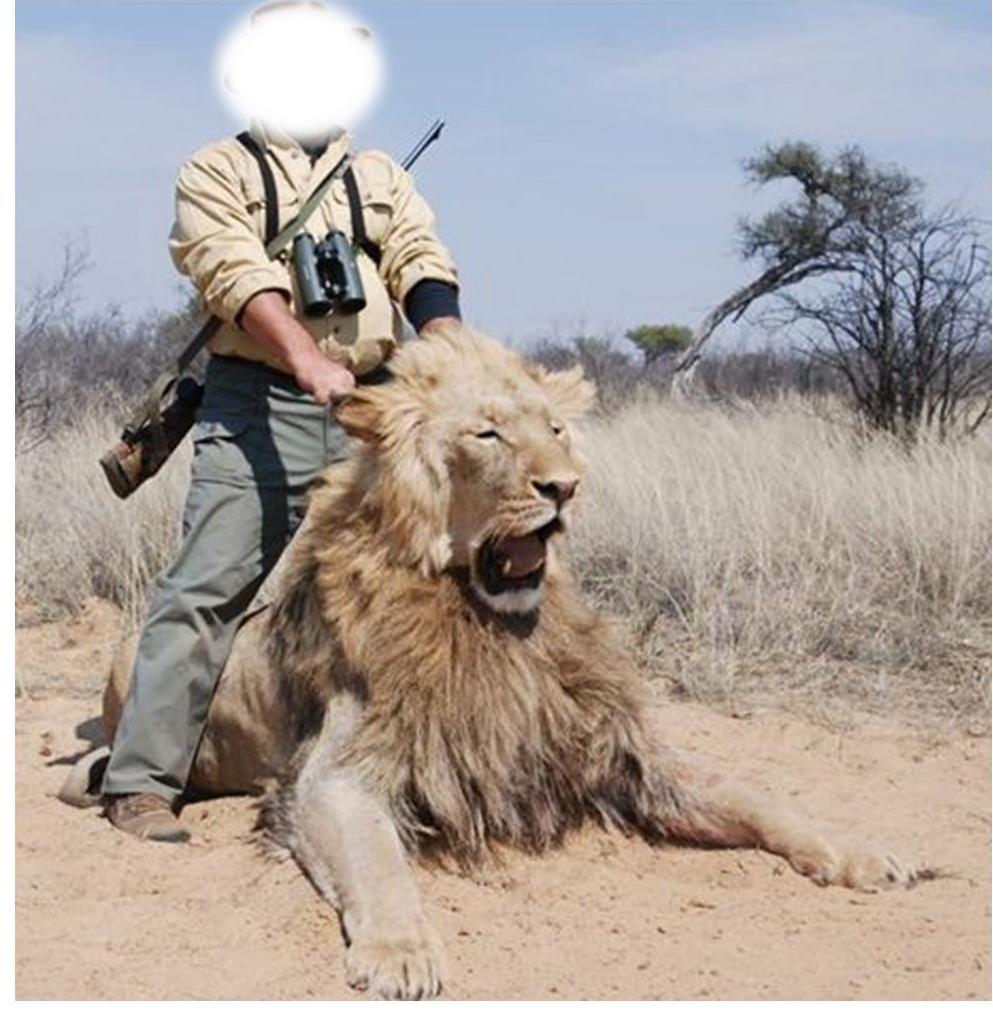
- Never stand on or put your foot on the trophy or adopt a dominant attitude (Figure 5).
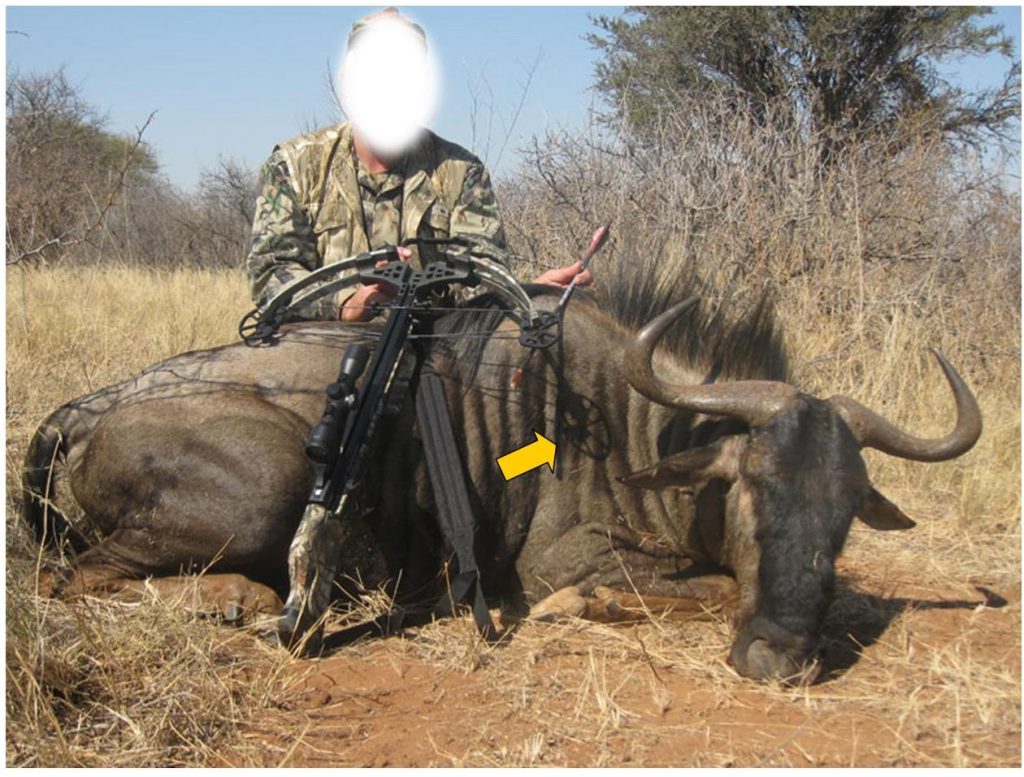
- If the animal has been hunted with a bow and arrow remove any arrows found in the dead animal before taking photographs.
- If large and disfiguring exit wounds are present – especially with headshots – position the animal in such a way or take photographs from an angle in which these will not be visible in the photograph.
- Make sure no shadows from ears, horns or other objects fall across the trophy (Figure 6).
- Don’t use rocks or sticks to prop the head up. If you do make sure they are not visible in the photograph.
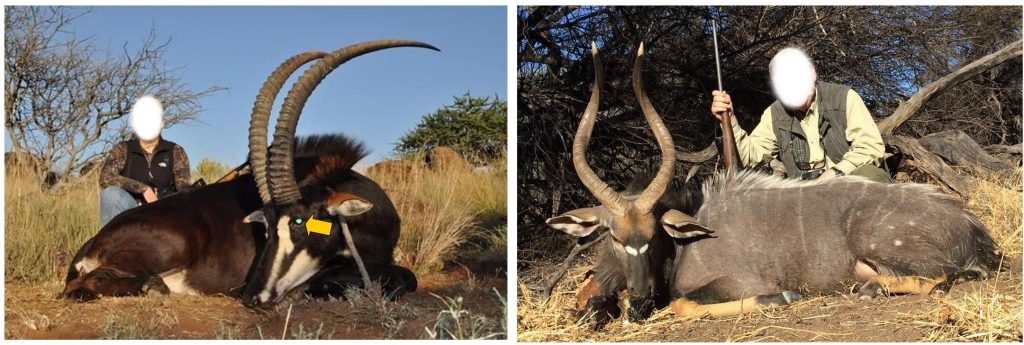
- Try if possible to skyline the horns in animals carrying horns or make use of a contrasting background so that the horns stand out sharply (Figure 7).
- Check that there are no unnatural objects in the background such as vehicles, fences, power lines, or equipment. Onlookers should not be visible in the photograph. Nothing should detract or draw away attention from the animal.
- Lie down on your belly to get a photograph from a low angle. This accentuates the animal and makes for a great photograph.
- Remove grass and any large object away from in front of the animal.
- Don’t pose with a beer can in your hand!
Technical aspects of a hunting photograph
Fortunately, modern digital and cell phone cameras are by and large user-friendly and “idiot proof” but even taking this into account photos can come out poorly or not at all and the opportunity of having a record of a hunt can be lost forever so take the trouble to consider some “technical” guidelines to avoid disappointment.
- Take time and trouble to prepare and set up the scene. Give attention to detail with the animal and the composition of the photograph. Don’t be in too much of a hurry.
- Take enough photographs. You will never have another opportunity to record this specific hunt. Digital photography has made photography inexpensive and it will cost you nothing to take a lot of photographs from which those that come out best can be selected.
- Even using modern digital cameras “lens flare” can spoil a photograph. Lens flare occurs when spots of sunlight are visible on the photographs. Make sure of the lighting. A good photograph can become a great one if the lighting is correct. The best lighting occurs early morning and late afternoon. Guard against lens flare by not taking photos facing toward the sun and by screwing a rubber lens shade onto your camera.
- Good composition makes for a good photograph. Position the animal in the best scenery available. Try and centre the entire animal and the hunter just within the frame of the shot. Fill the frame with the object. Two variations are to frame your shot horizontally or vertically.
- Poor composition: Often, good photographs are made poor by small, avoidable errors in composition, such as cutting off a critical part of the photo, being off-centre, your object is too small, etc. The way to avoid poor composition is to scan your eye around the perimeter of your picture frame and pay particular attention to what lies just beyond your subject (Figure 8).
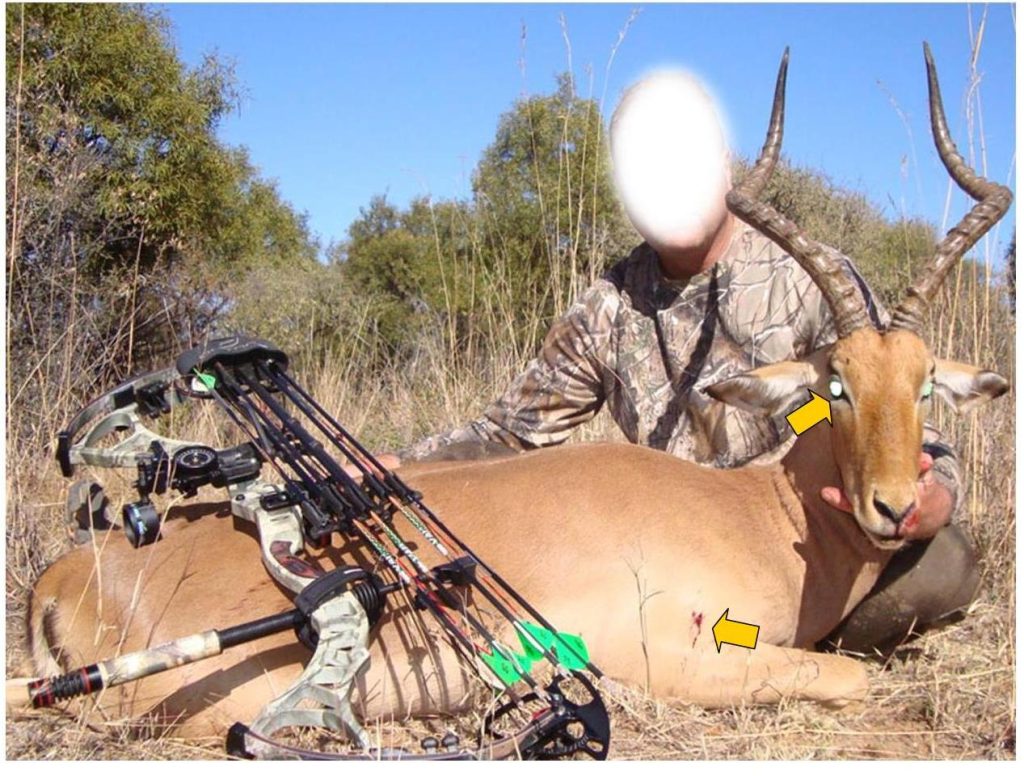
- Ugly composition: Clean up the animal. Showing “blood and guts” is in poor taste. Avoid cluttered foregrounds and shadows falling on the subject. If a firearm or bow is included in the photograph it should not dominate the photograph (Figure 9). Remember it is about the animal. Hat shadows or branches obscuring the hunter’s face detract from the quality of the photo. Don’t let the photographer’s shadow intrude into the photo. Avoid litter and unsuitable backgrounds such as vehicles.
- Few things are as disappointing for a hunter as getting photos that are dark and grainy – underexposed – or bleached and washed out – overexposed (Figure 10).
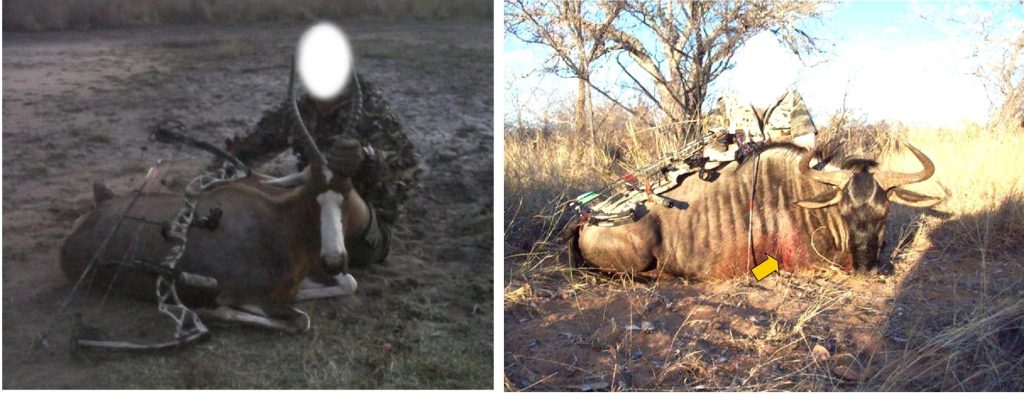
An underexposed photo occurs when there is not enough light falling onto the camera lens and overexposure when there is too much light falling on the lens. A good rule is to set your camera’s light meter for the light conditions then do the following – called “bracket exposing”:
If your photo has a “Manual” option, take a photo with your camera’s internal light and F-stop setting recommendations. Shoot the same scene at one F-stop over, two over, one F-stop under, and two under your predetermined light reading. This might seem extravagant, but it is the only way to guarantee success.
It could end up being a real shame if you miss a once-in-a-lifetime opportunity. If you are not sure how to set manual settings put your camera on “Auto” so that it can pre-determine the necessary settings automatically. This is a fairly safe option.
- Avoid red or reflected eyes. Eyes have a reflective layer that can bounce the flash of a camera back to its origin and show up in the photograph as “red eye”. If there is still enough light take a photo at a slower shutter speed with the camera on a tripod without using a flash. If you have to use a flash taking the photo from different angles may avoid red eye. Red/reflected eye can be edited out by software photographic editing programs.
- Keeping the image sharp and in focus. There are three main causes of indistinct or blurred images:
- Improper focus
- Camera shake (movement)
- Dirty or cracked lenses /screens
Here are ways you can avoid these problems:
- Focus on the hunter’s eyes – if the eyes are in focus the rest of the photograph will be as well.
- Camera shake is usually caused by movement, excitement, slow shutter speed in low light conditions, or extreme cold. To solve these problems use a flash in low light conditions, use a tripod or some support and activate the camera’s self-timer or use a release cable extension, hold your breath when you release the shutter.
- If you have to hand-hold your camera, make sure your shutter speed is greater than your lens length. Example: set your shutter speed at 1/125th for a lens length of 100mm.
- If your lens is dirty or your screen is cracked your image will come out blurred. Breathe on the lens and wipe it gently in a circular motion with a lens tissue or soft cloth.
- Keep your hands and fingers out of the way of the lens.
- Remember to clean the inside of your camera as dust can collect on the inside of the lens as well.
Hopefully, the above guidelines will help you take trophy photographs that are ethically acceptable and of a photographically high standard.

